Saturday, May 30, 2009

The Weekend

I polished off a ton of things on my to-do list this weekend including some sewing, cooking and tedious errands. Here's the scoop on the garden:
  • Cut two trees back that were blocking my sun.
  • Moved all the veggies from the old veggie bed to my new garden bed (still in progress).
  • Weeded and pulled out some unwanted morning glories.
  • Traded my rocks for some raspberry bushes from my neighbor (more to come on them).
  • Carrots have emerged.
  • Radishes are growing red now.
  • Squash, green beans, and peas are doing well. Should have peas to eat soon.
  • Worked on the back garden bed some more.
  • Fixed my corn bed up.
  • Moved plants around in my "island".
  • Divided the penstemon and achillea.
  • Repotted the bottle neck gourd, cucumbers, spaghetti squash and peach tree.
  • Store bought some white 'ghostbuster' eggplant and petunias.

Grassiass

My husband says that all the time! Well, here's his baby, his pride and joy. His bed of grass.


Gracias amigos for letting me amuse myself!

Camou your Veggie Patch

So if you were wondering why I was leaving drive by pictures this week, it's because I'm hard at work on the back garden bed. Here's a sneak peak of the concept I'm working on.

Using that weed suppressing landscaping material, I cleaned off an area to put my corn patch for this year. It's right against the shed, lots of sun, water and it's unobtrusive. I cut 4"x4" spaces out of the material in rows and plopped 2 corn seeds in each hole. Thin to the strongest one plant per hole. It's been 2 weeks and now they are at yummy bunny eating height and I know I've been successful with each planting hole, but...it's ugly as all with the rain and wind blowing all sorts of stuff on it. The material isn't something off a fashion run way either.


So I topped it off with about 1" high of peat moss. Peat moss has all kinds of uses and one of them is you can use it to "mulch". It's safe for veggies because it doesn't contain chemicals like the landscaping wood mulch. Looks better huh?


Then I had to put up the old ugly wire fence to keep the bunnies out until the plants are tall enough out of the bunny nibbling reach. In the corner is a container of pumpkins which I plan on co-planting with the corn. The pumpkin vine will act as a natural ground cover to keep weeds somewhat at bay.


Mmm Do you like your corn with or without butter? Or what else do you put on your corn?

Thursday, May 28, 2009

Foxglove


Still working on my back garden bed. Here are some foxgloves to keep you occupied.

Wednesday, May 27, 2009

Hump Day

Here's an update on my heirloom tomato plants. They are doing well especially with the rain we received the last couple of days. In general I found that the larger the tomato, the smaller the plant.


The back garden bed is coming along. We tilled it today and shaped up the edge. I'm thinking about making a bench to put in the center of the bed.


The soil was really soft. I transplanted some hosta and black eyed susans to the right of this picture. I'll probably lay some pavers down as well.

Tuesday, May 26, 2009

Back Garden Bed

Now that all the flowers are blooming and all the vegetable seedlings are in the ground, there is nothing left but to give myself a new project to do!

The veggie patch was the first thing we ever dug up and I chose the spot based on the amount of sunlight this area received making it perfect for a veggie garden. However, lacking experience I didn't think about aesthetics. It's just a square in the middle of the back of the yard making it a big eye sore. The garden stakes and netting doesn't help either. It's okay when things are growing, but right now it looks terrible. I have been thinking about different ways we could do to make it look better like rounding the corners off, but realized it's like a bad haircut - The more you try to make it look better, the worse it will get. We thought about putting sod back over it, but then where would the veggies go?


So I swallowed my pride and decided to extend the back garden bed out about 5 feet and creating a concave curve from one end of the yard to the other (blue line). Whatever is still beyond the blue line, we'll patch over with grass seed.


The plan is:
  • To move the tomato, eggplant, and pepper plants into this new extended garden bed.
  • Move the landscape material (brown paper) with it.
  • Instead of mulch (which has chemicals), put peat moss on top of the landscaping material for looks.
  • Plant two rose bushes, two rings of Irises (when it's time to divide & transplant), dianthus (edible perennial flowers), and sedum, which will look beautiful next year. This way there is color all summer long and they are heat/drought tolerant.
  • In back center under the shade, plant hosta and foxglove.


Cutting this garden bed wasn't as hard as I thought it would be. Since it's been raining, the ground was quite soft. I started a foot out from the previous garden bed line. I went back to the house and looked from our deck to see if it was deep enough, curvy enough, etc. I went back and kept digging out further and further until I got the look I wanted.

Monday, May 25, 2009

Saturday, May 23, 2009

A Self Portrait

My girlfriend said she's starting to forget what I look like because all she ever sees are photos of flowers, so this is for her. Me, my peony and my strawberry dress.


My husband wanted to get in on the action as well. This is him and his foxglove.

Friday, May 22, 2009

Peonies

I waited all year for you...


Kansas Peony


Shirlie Temple Peony

Wasn't it worth it?

Before & After

I love watching the garden evolve. Last year I was so clueless with planting flowers and was getting a little frustrated. Now I'm excited to see what the garden will look like next year as things grow larger. I think it's about that time for another Before and After!

Before 2007:


Before 2008:


NOW:

Wednesday, May 20, 2009

Are you here yet?

Happily anticipating this to bloom!


Foxglove - A biennial, but I carefully transplanted some babies from last year's foxglove. This way, there will be blooms each year.


Knockout rose


Dianthus (fuchsia flowers) - Last year, I bought these skinny little dianthus plants from Walmart of all places. I didn't know it was a perennial and it has more than quadrupled the size.

Container Gardening

I know I know. With a yard like mine, why am I growing things in containers? Veggies actually do grow better in containers since you can control the soil and shield it from the elements. I decided to do carrots in a container this year since it requires very soft loamy soil to grow nice straight carrots. Also, I chose a shorter carrot (5") to grow.


I took an old plastic bin and my husband drilled large holes in it for drainage. I filled with own mix of compost, verminculite and peat moss for a soft, light consistency.


I did two rows of carrots. Then I took advantage of the space "above ground" and planted some basil plants down the center. The basil leaves will provide some shade which will help retain moisture during the hotter weeks. If they take up too much space, I can still transplant the basil without disturbing the carrots.


Also in containers, I have radishes, summer squash, white "saucer" squash, and bell peppers. I just want to see how they do in containers as compared to the ones in the ground. During the hot summer, I can also go harvest some veggies more easily without going to the back of the yard.

Tuesday, May 19, 2009

Shade Plants

I planted these Coral Bells, Hosta and Jacob's Ladder last year and they have grown so much since then. I love how the garden is filling in now and I can even divide some and transplant them to other areas of the yard.


Today, I mulched the new area I worked on over the weekend and cut the Azalea back. I still need to replace the gutter and camouflage it with some mulch.

Monday, May 18, 2009

"His eye lit on a cluster of yellow roses..."


There's something about yellow roses that make me think of a Victorian Garden. It's such classic beauty. I bought this one last year because it reminds me of the book The Age of Innocence and there's this whole metaphor involving yellow roses.

Don't you love a good story? Do you have items in your home that remind you of something? It may be silly, but it's special to you.

Head, Shoulders, Knees and...

This Baby joined us today. It's a succulent called "Baby Toes". Aren't they adorable?


(Full sun, dry)

Today:
  • Planted my Dahlias that were in storage.
  • Planted new Freesia bulbs.
  • Planted new Daylily roots.
  • Made my own potting soil for carrots.
  • Mulched some more.
  • Cut Azalea back.
  • Peonies are beginning to bloom.

Sunday, May 17, 2009

My Herb Garden

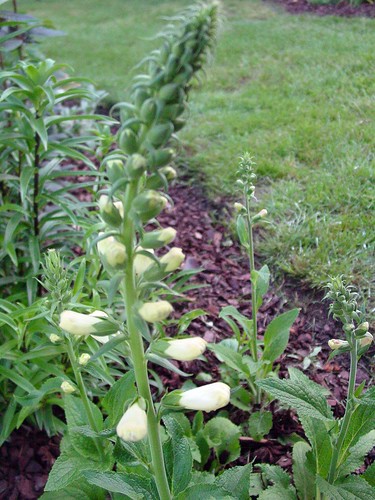
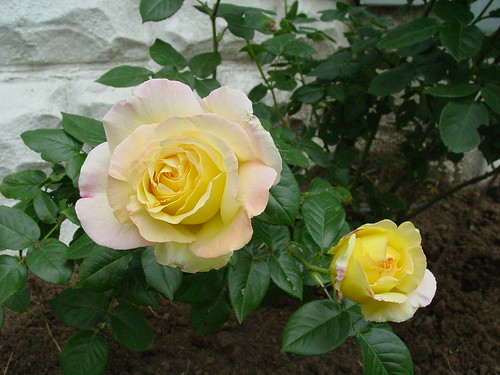
How sweet does this look?


Who doesn't love herbs? And a garden devoted to herbs sounds heavenly.


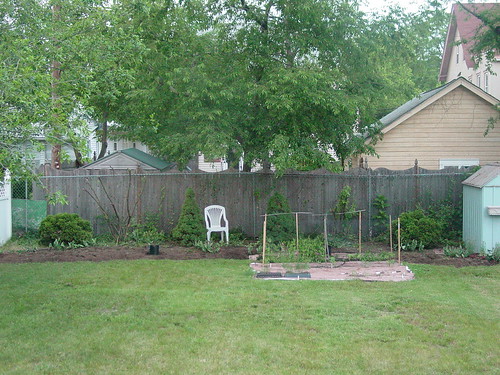
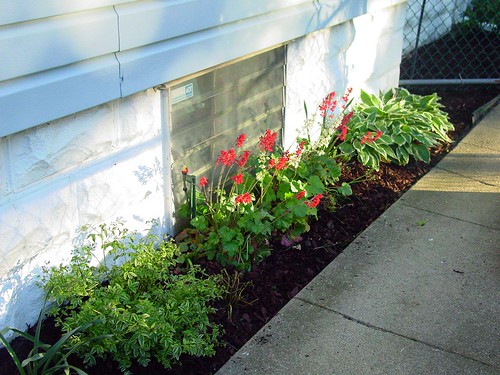
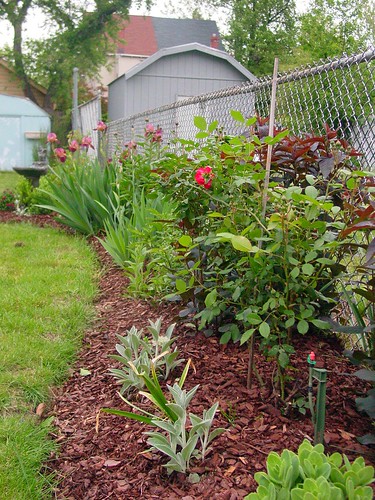
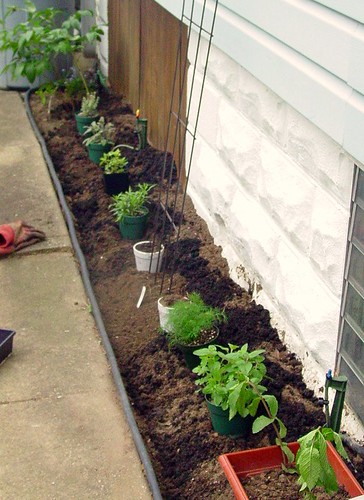
Now that we mulched the garden beds, I can't plant herbs randomly as I did before. You shouldn't ingest anything that has had mulch on it due to the chemicals. So I chose the small area on the north side of our house. It's near the kitchen which makes it convenient. It's an area that I could maintain and control the conditions of the soil easily.


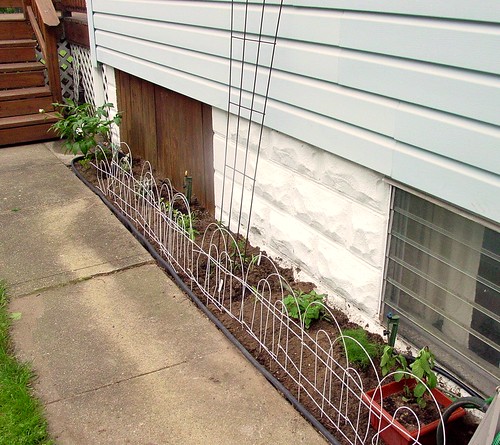
(left to right: Silver Thyme, Variegated Sage, Red Chili Peppers, Lemon Basil, Climbing Nasturtiums, Violas, Jalapeno Peppers, Italian Oregano, Dill, and Mint) The little fence is to keep the squirrels out for now. The neighborhood squirrels love to hide their peanuts here so they dig here ALOT! If my plants haven't set in yet, the big fat squirrel will turn the whole thing upside down.


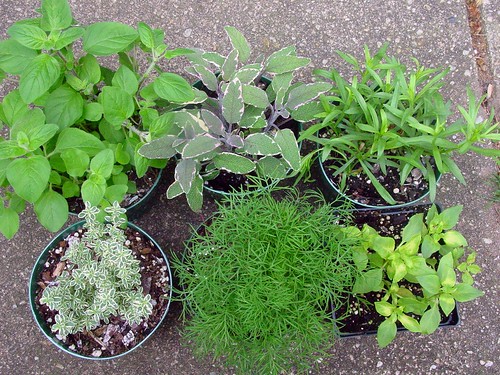
I started by amending the soil with lots of compost. One end of the garden bed is dry and the other is wet, so I planted each herb based on their needs. I alternated perennial herbs and annuals, so that there would always be something growing. Also, I chose variegated sage over regular kitchen sage (all green) and a silver thyme to change up the green colors in the leaves. I added some climbing Nasturtiums and red chilli peppers for color.


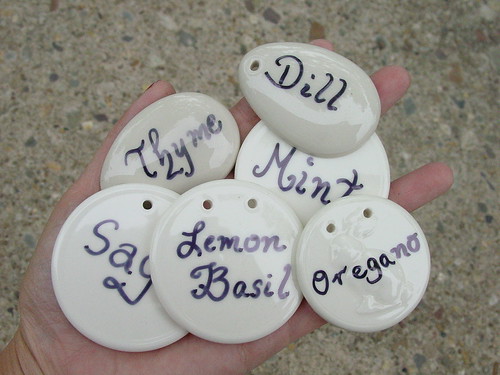
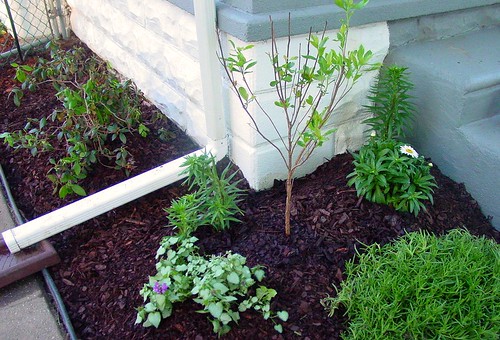
The final touch were these porcelain markers from Fishs Eddy that I bought a while ago. I love them and they are so much more durable than the plastic markers. I'm so excited about my herb garden. I hope it works out. Herbs can be finicky sometimes. Just one more thing: I potted the mint (because it gets out of control), arugula for control, and cilantro (so it can reseed itself).

What is your favorite herb(s)?

Saturday, May 16, 2009

Labor Pains

But it's so worth it! Last night, we tilled our new garden bed and planted our Crepe Myrtle. I divided the purple Bearded Irises and transplanted some variegated Hosta in back. The purples, white and greens look good together, so I'm going to stick to those colors for this area. I'm in the market for some white flowers to put in front. What do you suggest?


Today, I spent 8 straight hours working on this little area on the front side of our house. We kept saying that we needed to do something with this area, but we knew it would be such a pain that we kept putting it off. I finally got fed up today and chopped this Hydrangea back and yanked that sucker out.

There were a couple of things at play here:
  • The Hydrangea was huge, but was not getting enough sun.
  • It was HUGE and cumbersome. It was 5'x5'x4' deep. We had to cut it back which looked ugly and walk around it making a huge bald spot in our grass.
  • It was a magnet for dead birds and leaves cultivating underneath the branches.
  • The former gutter that goes under the pavement is clogged and this newer gutter makes a mess on the pavement.
  • Because of the inefficient gutter, the soil is constantly washing away making yet another mess.
  • (not shown) The gate wouldn't open all the way because of all the soil and branches in the way. Again, annoying.


3 hours later:

I cut the Hydrangea back (not shown) and dug it up. It was a pain, but not as bad as I thought it would be. There were 6-7 major roots which I cut with tree branch cutters. Then I pried it up with a spade. I moved over 3 wheel barrows full of soil to other areas around the house, so that the gate can swing fully open. Then I had to pick out all these rocks in the soil.


I transplanted an Azalea from the south side of the house over to this side for shade. The Azalea was always getting burnt out as soon as it had blooms on it, so this may be a better spot for it. There's also a Lamium and Fingerplant which are both great groundcovers. I transplanted a couple of pink lilies for some added whimpsy. I planted a new Shasta daisy, which will grow into a full ball (like a Mum) to fill the corner. Also, some Gladiola bulbs, which I hope will a nice appearance in the summer. And a pink "Ruby Spice Summersweet" shrub. The darker soil that you see on top is compost to amend the poor old soil. The light brown sheet is that landscaping material used to suppress weeds. I plan on putting mulch on top tomorrow.

Friday, May 15, 2009

Garden Views

I have to say I am in love love with my home. I just love the view as I approach the house. The garden peeps out and it looks gorgeous to me!


Thursday, May 14, 2009

Siberian Irises

One word...Breathtaking. Is that one word or is that a compound?


Unlike Bearded Irises, Siberian Irises have woody roots just like Peonies. Plant them in a sunny spot and forget em. They will bloom and multiply for years. They can be divided, but not the way Bearded Irises are divided (where each tuber can be pulled away). It's not as easy and when you do divide them, they might not bloom the following year (similar to Peonies).


They are on the short side right now (since I divided them last year), but as the years progress they can be 4' tall and the plants have a "fountain grass look". They also make an excellent cut flower for a centerpieces if you want to get some quick flowers for the dinner table.


I'm going to have to pay another visit to my dear friend Barbara who I found on Craig's List last year. She sells her thinned plants on Craig's List and I bought these Siberian Irises and some pink Peones from her. For the price you're paying, you're getting a plant that has years of growth already which is priceless!

Veggie Bed

On Tuesday, I planted most of my veggie seedlings into the garden bed. In order to avoid some weeding this year, I laid down some "landscaping material" to suppress the weeds. It's pretty strong stuff, but also flexible enough that I can easily cut holes out where I want my seedlings to be. The material also retains moisture which is a plus.


I planted my tomato, bell pepper, eggplant, jalepeno, summer squash and chili pepper plants. I also started some radishes in a container and I'll work on starting some carrots in a container next. Last year, the carrots were a waste because the ground was too hard whereas you can amend the soil more easily in a container. This weekend, I'll prepare some other garden beds for the corn and pumpkins which are ready to go out now. I still haven't decided where to plant my watermelons and bottle neck gourds yet. In other news, the peas are doing really well.


It's going to be raining this weekend, so we'll probably be over in Our Place doing some home improvements... :)

Monday, May 11, 2009

Name this Plant

My mom gave me this, but we don't know the name of it. Can you help?

Live and Learn


Today I cut another new garden bed. This has been a slow work in progress. Each year I learn from previous year's mistakes and do things to improve my garden. Last year, we cut a 'concave' curve and planted a bunch of stuff. Then I realized it was all shade about 20" from the deck and I could never see the flowers comfortably if I stood on the deck. What a wasted effort! Also, part of the space would be in sun, so I had to plant 2 types of plants; both shade and sun. What a pain!

Last Year: (All shade, just my luck!)


I learned that the garden bed had to be really deep to space plants out appropriately AND to be able to step into the bed and work on the plants. Before, it was just narrow enough that I could not fit into the garden bed, but deep enough that I really hurt my back trying to stretch over to the plants. Because of our half/half issue, I decided to bring the garden bed out and plant a large Crepe Myrtle shrub which requires full sun. The shrub grows very thick which will create ALL shade below it, so I can plant all shade plants below. This weekend, we'll till the soil and I'll move some hosta to the garden bed.

In other news:
  • I planted my Lupine, Snapdragon, Forget Me Not and Ranunculus seedlings into the garden.
  • Potted some plants my mom gave me that she thinned from her garden.
  • Redefined my 'island' garden bed.
  • Potted a bell pepper in a large pot. Testing to see if it grows better than in a garden bed.