Look at what else this pink thumb can do. I wanted to try my hand at sewing and I love these adorable blankets that can be seen on etsy and other places these days. As an extra special present to my girlfriend who is having twin girls, I wanted to make these blankets for them.

Materials:
- Owl fabric $5.99/yard
- Solid fabric $2.99/yard
- Thread
- Sewing machine ($100)
- Variety of ribbon ($5)
Although I used the same pattern on the front, I used a different color on the back, so they could decipher between the two for the twins.

Mommy-to-be is a really cool chick and anti-frou frou, girly stuff, so I thought this pattern was pretty cool. It's girly, but not over the top. I love the owls and trees.

Gently wash the fabric with a tiny amount of laundry detergent and dry before proceeding. New fabrics (including clothing and furniture) emit chemicals which are harmful by both contact and inhalation (in large amounts). Babies are probably most sensitive to them by contact, so it's imperative to wash all new fabrics.
Using different pink and green ribbon, cut them to the desired length.

Cut the fabric to the desired size and shape.
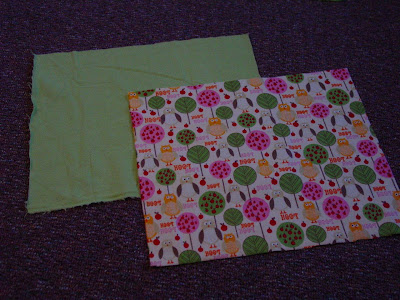
Then arrange the ribbon around the fabric to see if there is enough ribbon, and to vary the pattern on the ribbon.

On the front side of the fabric, fold the ribbon in half and secure it to the fabric. I used scotch tape instead of pins because it was more convenient.

Then put the second piece of fabric down FACE DOWN. Think of a pillow case that is inside out.

Pin the 2 pieces of fabric together to keep them in place while you sew.

Get your sewing machine and thread ready.

Starting on one end, begin sewing.

When you get all around 4 sides, stop before you get to the end and leave an opening to flip the blanket inside out. At each corner, you want to sew in reverse and back forward again to make sure it's nice and tight, so that it doesn't rip easily.

Just to tidy things up, trim the edges off a bit.

Using the space you left open, gently start flipping the blanket inside out.

When it's all right side out, peel the scotch tape off the ribbon and discard it. Using the back of a wooden spoon (or something long) push the corners out so that they are nice and sharp at 90 degrees. Then iron it on low.

Using a needle and thread, sew up the little opening from the inside. It will be folded in so once you iron it, you won't be able to see the stitches.

There you have it! A baby tag blanket!

It wasn't difficult at all. It does require some problem solving, planning and imagination. I'm thinking of sewing some bags next. Any suggestions?


 Posts
Posts


